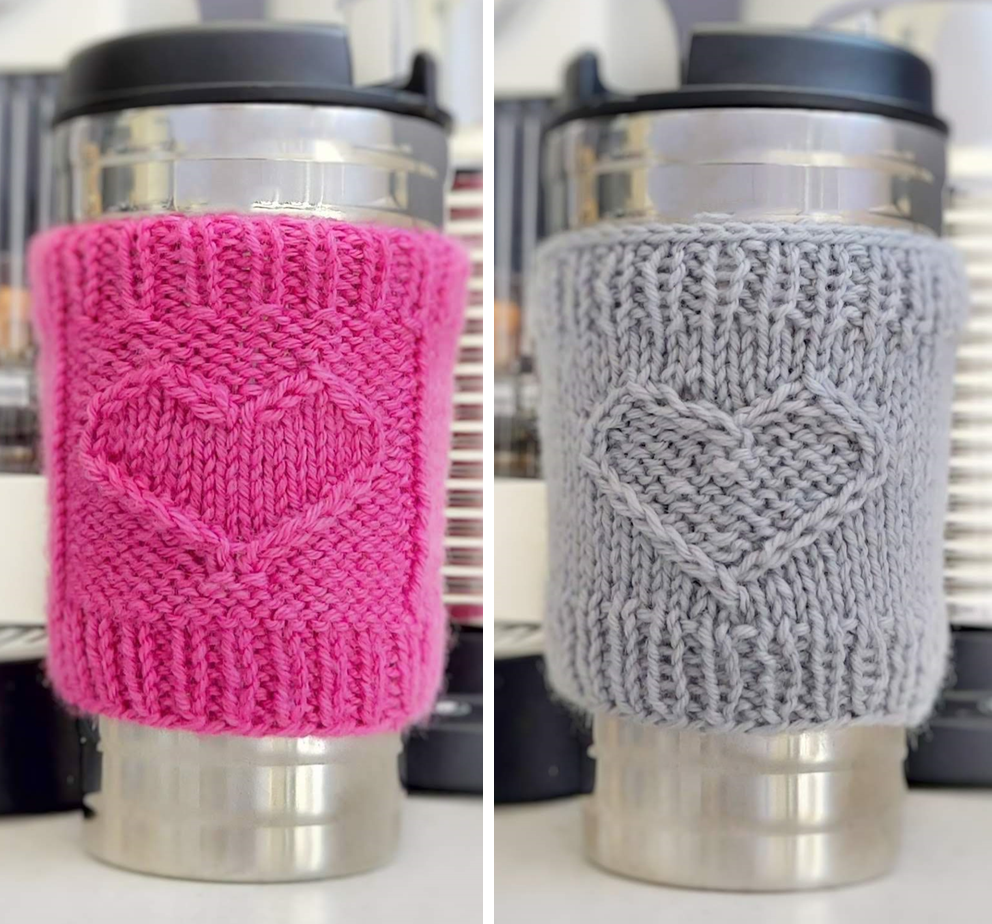
To celebrate the launch of my website and new brand, I have a brand new free pattern to share with you – Wear your heart on your sleeve – travel mug sleeve. The pattern is available here on my blog but is also available in PDF form on Ravelry. You can download this for free for the time being with the code FREEBIE. Even more exciting than a free pattern – it’s actually 2 patterns! You’ll notice from the pictures that there is a variation on a theme – I’d love to hear which one you decide to make. Let me know via Facebook or Instagram.
*Why do I do it this way and not just make it a free download on Ravelry? Because this way I can guarantee that if I update the pattern, you will receive the updated copy into your Ravelry library, and when it turns into a paid for pattern, you will still be able to access it and it won’t disappear from your library.
If of course you fancy purchasing it instead of using the free code (I’m not sure why you would, but I’d appreciate the sentiment!), then I will donate any profits made from the sales of this pattern throughout my launch month (June 2020) to a charity (or two, if there are enough funds).
I’d love to see any finished makes, tag me on Instagram if you post any finished pictures.
THE DETAILS
You will need:
◊ DK weight yarn, approx 35m/38yds
◊ 4mm circular needles or dpns (or size needed to obtain gauge)
◊ Darning needle
◊ Stitch marker (optional)
◊ Cable needle (optional)
Gauge:
◊ 24 sts and 30 rows = 10cm / 4in in stockinette stitch worked in the round
Abbreviations:
K – knit
P – purl
CO – cast on
LT – left twist
RT – right twist
1/1 RPC – 2 stitch right leaning cable with a purl st
1/1 LPC – 2 stitch left leaning cable with a purl st
St(s) – stitch(es)
sl1 – slip 1 st knitwise
k2tog – knit 2 sts together
psso – pass slipped st over
M1L – make 1 left (increase st)
M1R – make 1 right (increase st)
M1P – make 1 purlwise (increase st)
Techniques / Special Stitches:
RT – right twist or right leaning cable: Slip 1 st onto cable needle, hold in back, k1, k1 from cable needle
LT – left twist or left leaning cable: Slip 1 st onto cable needle, hold in front, k1, k1 from cable needle
*Alternatively these 2 stitches can be worked without a cable needle. There are plenty of videos available with a quick Google search to show how to do this.
1/1 RPC – right leaning cable with a purl st: Slip 1 st onto cable needle, hold in back, k1, p1 from cable needle
1/1 LPC – left leaning cable with a purl st: Slip 1 st onto cable needle, hold in front, p1, k1 from cable needle
M1R – right leaning increase: Pick up the bar between the last st you worked and the one you are about to work with the non-working needle, bringing the needle from the back to the front. Knit into the front of this newly created stitch
M1L – left leaning increase: Pick up the bar between the last st you worked and the one you are about to work with the non-working needle, bringing the needle from front to back. Knit into the back of this newly created stitch
M1P – increase with a purl stitch: Pick up the bar between the last st you worked and the one you are about to work, bringing the needle from front to back, then purl through the back loop of the strand. (This is technically M1L purlwise, but you can’t tell the difference between that and M1R purlwise when the purl side is the RS of the work as it is here)
THE PATTERN
Remember if you’d rather this in a downloadable and printable PDF format, it is available on Ravelry, and is currently free to download with code FREEBIE.
With both versions, the cast on amount fits a circumference of approx 25cm (9 7/8 in) well. If your tumbler or coffee cup is larger or smaller than this, add or subtract multiples of 2 sts.
GREY SLEEVE
CO 50 sts using your preferred cast on method. I used long tail. Join in the round, taking care not to twist sts. Place marker to indicate beginning of round.
Rounds 1-6: *K1, P1, repeat from * to end of round.
Rounds 7-9: K to end of round.
Round 10: K9, LT, K to end of round.
Round 11: K8, 1/1 RPC, 1/1 LPC, K to end of round.
Round 12: K7, 1/1 RPC, P2, 1/1 LPC, K to end of round.
Round 13: K6, 1/1 RPC, P4, 1/1 LPC, K to end of round.
Round 14: K5, 1/1 RPC, P6, 1/1 LPC, K to end of round.
Round 15: K4, 1/1 RPC, P8, 1/1 LPC, K to end of round.
Round 16: K3, 1/1 RPC, P10, 1/1 LPC, K to end of round.
Round 17: K4, P5, K2, P5, K to end of round.
Round 18: K4, P5, LT, P5, K to end of round.
Round 19: K3, LT, P3, RT, LT, P3, RT, K to end of round.
Round 20: K4, LT, P1, RT, K2, LT, P1, RT, K to end of round.
Round 21: K5, M1R, SL1, K2TOG, PSSO, M1L, K4, M1R, SL1, K2TOG, PSSO, M1L, K to end of round.
Rounds 22-23: K to end of round.
Rounds 24-28: *K1, P1, repeat from * to end of round.
Bind off stitches loosely in preferred manner. Weave in ends. Block lightly.

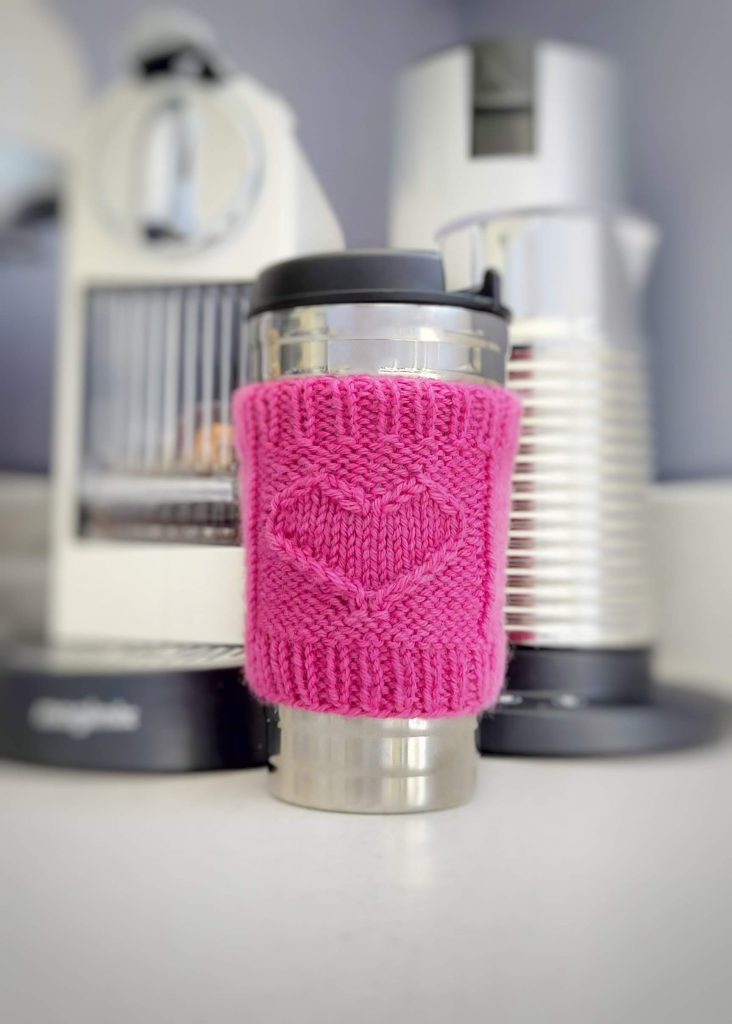
PINK SLEEVE
CO 50 sts using your preferred cast on method. I used long tail. Join in the round, taking care not to twist sts. Place marker to indicate beginning of round.
Rounds 1-6: *K1, P1, repeat from * to end of round.
Round 7-9: K3, P18, K to end of round.
Round 10: K3, P8, K2, P8, K to end of round.
Round 11: K3, P7, RT, LT, P7, K to end of round.
Round 12: K3, P6, RT, K2, LT, P6, K to end of round.
Round 13: K3, P5, RT, K4, LT, P5, K to end of round.
Round 14: K3, P4, RT, K6, LT, P4, K to end of round.
Round 15: K3, P3, RT, K8, LT, P3, K to end of round.
Round 16: K3, P2, RT, K10, LT, P2, K to end of round.
Rounds 17-18: K3, P2, K14, P2, K to end of round.
Round 19: K3, P2, 1/1 LPC, K3, 1/1 RPC, 1/1 LPC, K3, 1/1 RPC, P2, K to end of round.
Round 20: K3, P3, 1/1 LPC, K1, 1/1 RPC, P2, 1/1 LPC, K1, 1/1 RPC, P2, K to end of round.
Round 21: K3, P4, M1P, SL1, K2TOG, PSSO, M1P, P4, M1P, SL1, K2TOG, PSSO, M1P, P4, K to end of round.
Rounds 22-23: K to end of round.
Rounds 24-28: *K1, P1, repeat from * to end of round.
Bind off stitches loosely in preferred manner. Weave in ends. Block lightly.
Happy knitting!

*Please note that as a free pattern, this has not been tested as thoroughly as my other patterns. If you do find any mistakes, please let me know.


Leave a Reply